Skip navigation

As usual, the transition between the farm in Santa Barbara and the one in Sandpoint left me dislocated and in a creative drought.  I try to avoid this by assembling the ingredients for a variety of projects before the move, so that starting something new requires minimal inspiration and brain power.  It doesn’t always work.

The miracle of how two basic squares of fabric can be assembled to form a decahedron  has always intrigued me so, even though I am not particularly fond of cross-stitch, this seemed like a good time to attempt a biscornu.  Indeed, I love the word as much as I do the shape.  I’m not sure that it actually is a decahedron because not all the faces meet at a sharp line, which would make it difficult to sit the shape on any given facet.  Other stitchers tend to refer to the biscornu as an eight-sided figure, but that omits the top and bottom.  However you describe it – it is quick, cute, and fun to stitch.

Free biscornu pattern number 37 from The Floss Box on 16-count natural aida cloth with an assortment of DMC floss colors that I happened to have on hand.

It was so much fun that I just had to start another one!  Visit again soon – there will be more.  After one or two more of these sweet little cushions, I should be refreshed enough to return to ‘serious’ stitching.  In the meantime, I wish you soft summer days and evenings.

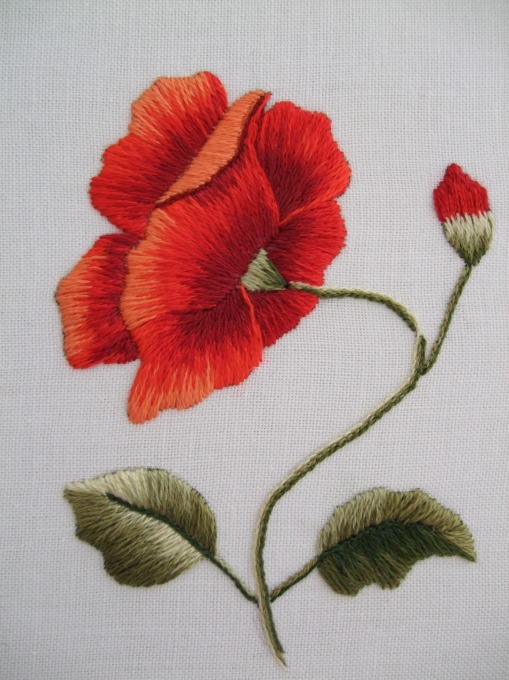
One of the projects from Trish Burr’s DVD:  The Long and the Short of It.

These luscious reds (to which the monitor cannot do justice) have made me very happy.  I loved every stitch of this project.

An excellent weekend to all!

Much better!

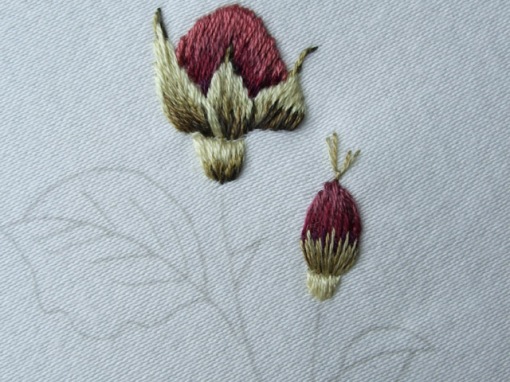
The Burgundy Rosebud kit by Trish Burr.  Pattern and instructions are also included in her long and short stitch DVD.

After an e-mail exchange with Trish Burr (a charming and most gracious lady) about the poppy project, I was persuaded to have another crack at soft shading.  This time, with the assistance of Trish’s excellent video tutorial on long and short stitching.

Here’s what I have, so far:

A couple of tips from the video radically changed my approach to this technique with, I think, a better result.   We’ll see how the rest goes…

Remember what I said about the temptation to start something new in stage six?

Somehow, as my frustration with my lack of knack for soft shading grew, these little slippers (Ravelry link) found their way onto the knitting needles and were whipped out in a matter of a few evenings.  Of  course, they needed some adornment…and bird tracks in the dust down by the creek, in the shade of the live oaks, provided inspiration.

The tracks do go all the way down the outside of the foot to the heel, but I was unsuccessful in obtaining a decent photograph.  It is no small feat to make decent photographs of one’s own feet.

When I embarked on this exercise in soft shading, I did not actually believe I would finish it.  In fact, I almost did not start it.  My first trip to Michael’s to buy linen and floss was unsuccessful.  Newbies are easily confused when they cannot find the exact materials specified in a project.  Only the voice of experience can guide one in deviating from a prescribed path.  So, when I found only 28-count linen, I was stymied.  I started gathering up the floss colors anyway…and then put them all back; and went grocery shopping instead.

On my second visit, the purchase was still a conditional one in my mind:  “If they have all the colors required for the project, I will buy the materials.  Otherwise, I won’t.”  Even then, I took my sweet time about it (putting misplaced floss skeins back in their proper bins) and, the floss aisle tidied and the transaction completed, was still not feeling committed to stitching the poppy.  So many colors!  How on earth will I keep track of so many skeins so close in value?  On arrival back at the house, the Michael’s bag got tossed on the lower shelf of the craft cupboard.  A few days later, I took the linen out, prewashed it, ironed it dry, and applied fusible interfacing to the back.  This was my first use of fusible interfacing as a stabilizer for crewel embroidery; the Newbury Smalls were stitched in the traditional manner: using a muslin backing for the linen.  Iron-on interfacing expedited the setup, but I think I prefer muslin.  Another afternoon, I used a little ‘between’ time to transfer the design.  However, it was only after I had devised a method of organization that would allow me to keep all the different colors straight, that I was excited enough to make a start.

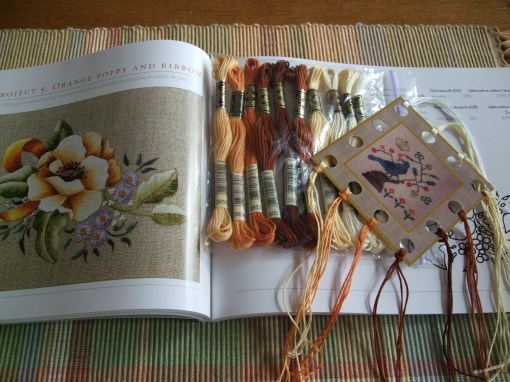
I first grouped the colors by element (ribbon, leaves, poppy, etc.) and put the skeins for each one in its own sandwich baggie, in the order in which they were listed.  Then I set up a floss holder with the colors in the same order.   A glance at the baggie (which I was very careful to keep flat and not jumbled) would allow me to select the next color from the floss card.  This was not quite as good as having the color numbers printed on the floss card, but served my purpose well enough.

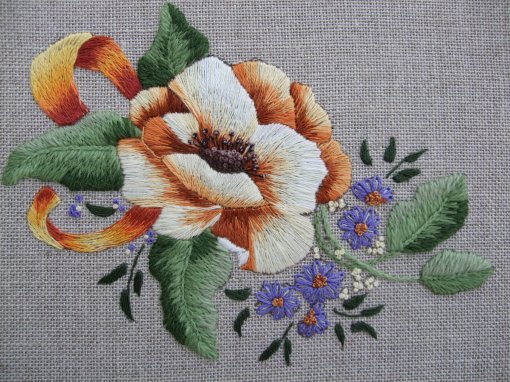
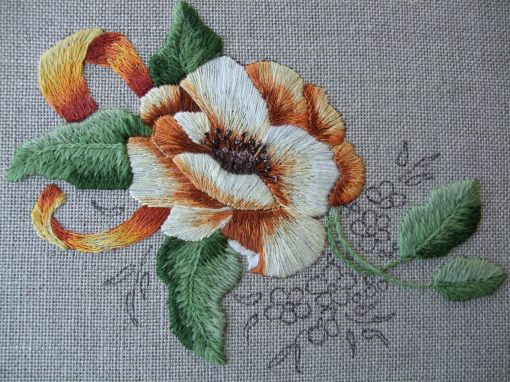
You have watched the project evolve (project 5 from Trish Burr‘s beautiful book  Crewel and Surface Embroidery: Inspirational Floral Designs).  Now you get to see the finish:

I have not forgotten that I promised to show you what I made on my ‘stage 6’ detour.  Once I had finished the soft shading of the poppy, I could not put this down.   Now, to finish up the other project, and set up one more soft shading exercise.  Yes, after all that fussing and moaning, I am going to give it another try.

Have a wonderful weekend!

I will never be a Mary Linwood.  Indeed, I cannot even imagine devoting a whole life to recreating other people’s  paintings in wool.   I suppose that a certain spontaneity can evolve with experience but, the long and the short of it is that only exact placement of the correct colors will give the desired lifelike effect.  A bit like paint by numbers; albeit more refined.  The end product is very attractive, but the process does not feel at all creative to me.  At least not at this point.  Of course, it would be different working from one’s own drawings.   Since we have already established that I am a crafts person, not an artist, this is not likely to happen.  By the last petal, I was definitely yearning for some texture, and the wandering exuberance typical of Jacobean motifs.  So the french knot filling of the center was a fun romp.

Here, in all its shaded glory, is the poppy:

What I loved about stitching it: Outlining each element in split stitch (it is quite magical when one’s needle neatly splits something as thin as a single strand of embroidery floss from the back of the work without ‘hunting and stabbing’) and laying down the first row.  At that moment, there are myriad possibilities of a good outcome.  It tended to be all downhill from there, as I fretted over which color to put where.  What I didn’t love: not really understanding what I was doing with the colors (and it shows in the end product).

Should any of you wish to work this project from Trish Burr’s ‘Crewel and Surface embroidery:Inspirational Floral Designs‘, here are the nuts and bolts of working the poppy:

  • the drawing that you work from, and which you have copied as your outline,  is not exactly the same as the finished project photograph in the book, so the written instructions can seem both inadequate and confusing.  When in doubt, consult the diagram showing stitch direction for placement, and then the photograph of the embroidery for color choice.
  • Identification of which petal is to be worked next is not always obvious.  If in doubt, follow the back to front rule, and check suggested colors against the photograph.  I read each petal instruction carefully, and then placed their numbers on my working diagram.  I had to rearrange the numbers a couple of times and still came up one petal short.  It would appear that there are no written instructions for the one on the bottom right.  For that one, I used the colors set out for petal four.
  • Following the stitch direction marked on the drawing gives the lower left petal a rather rigid and wooden appearance because the stitches lie almost perpendicular to the line they end on, and parallel to the horizontal line of the fabric,  and there is no inward tapering.  It would be better to feather these lines inward (as was done on the photographed sample).  I was sorely tempted to snip this petal out and rework it.  However, since this project is simply an exercise, it seemed better to leave myself a stark reminder of what not to do.

Now to finish filling in the rest of the flowers and leaves, and it will be done!

Next time, I will show you what I made when stage six had me firmly in its talons… Happy Easter!

Those of you who make things with your hands probably hear this on a fairly regular basis: “Oooo!  You’re so clever!  I could never make something like that.”

What these poor, unsuspecting, souls don’t know is that our first fumblings in any medium are usually on par with my aforementioned finger painting episode.  It is through persistence and perseverance alone that the beginner in a given discipline achieves a satisfactory outcome.  Of course, there are a select few who get everything right from the get go in every medium they touch; and we hate them.

Since my mind has not been overfilled with calculations as I plod through the petals of the poppy, I have been trying to distill the beginning learning curve into steps or stages; so I could perhaps explain it to someone who does not have a life in craft.

Please bear with me as I think aloud, and feel free to add your two cents’ worth in the comments.

The 7 stages of discovering a new craft or technique:

Stage 1: gathering the materials, tools,  and books; and dreaming.  This phase is usually the most fun; and many of us indulge in it far more often than the other six, as is witnessed by the size of the stash.

Stage 2: first fumblings, with great trepidation, and no small amount of confusion.  The tools and materials simply will not do what we are asking them to.

Stage 3: delusions of adequacy: “I’m getting the hang of it.”  This is the phase where one stops often to admire the evolving piece.  It can last for several days, or even weeks.

Stage 4: the scales are lifted from one’s eyes, and flaws appear in the first bits that were worked.  Here, some rip out and rework the first part of the project, others choose to live with the imperfection, the better to chart their progress in the new medium.

Stage 5: “Will I ever be any good at this?”  One is acutely aware of what is not working, but is powerless to remedy the situation.

Stage 6: “This is taking forever!” At this point, the craftsperson is generally beginning to scan for a new project and many succumb to the temptation to start something else; often in a different medium.

Stage 7: Completion.  This stage is frequently skipped, and the project becomes a UFO; living in a basket, drawer, box, or cupboard.  No small amount of guilt accompanies non-completion.  The late Kathy Cornachio (a very talented weaver, who taught me the basics of tapestry weaving) put this in perspective for me with the following question: “Did you learn what you needed to from the piece?  If so, you are finished with it.”

One reason that many neophytes give up making things after a brief try is that they consistently underestimate the length of time that it takes to produce a quality hand crafted item.  Here too there are exceptions (like the lovely and talented Dutch lady, who shall remain nameless, who can knit a complex color work dress out of sock yarn in a weekend), but for most of us craft takes time.  A lot of time.  Trying to hurry it along to meet a self-imposed deadline is counter productive.

At what stage am I with the soft shading?  5.5 – with not much progress to show for this week.

Many embroiderers prefer to describe this technique as ‘soft shading’ or ‘needle painting’.  From my perspective ‘long and short stitch’, and the polarity implied therein, pretty much sums it up.  It is: very simple and highly complex, dead easy and devilishly difficult, quick stitching that takes forever, meditatively repetitive work that demands constant vigilance and an eye to the whole picture.  I both love and hate it with a passion.

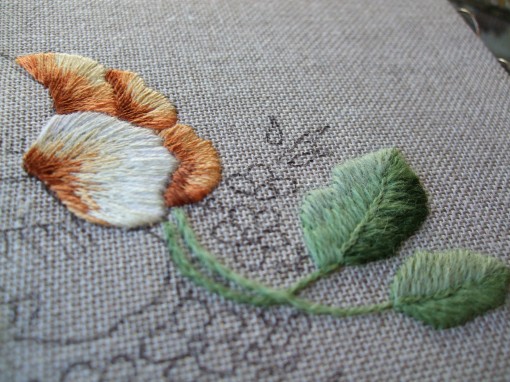
Progress with the poppy, so far:

Before you judge too harshly the quality of the color selection and placement, bear in mind that I flunked finger painting in preschool.  My classmates ended up with a large, colorful, sheet with which their parents could adorn the refrigerator door.  Mine was solid brown.  With swirls.

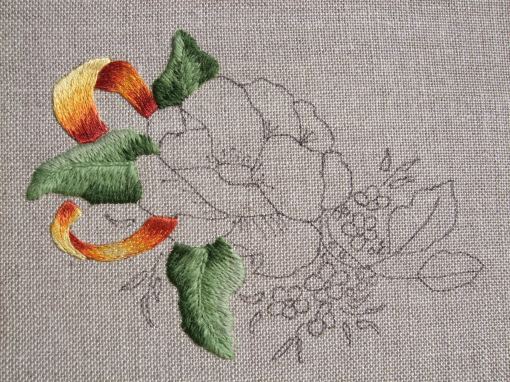
As I was hunched over the soft shading of the ribbon on this piece (from Trish Burr’s lovely book – Crewel and Surface embroidery:Inspirational Floral Designs) and doubtless muttering to myself,  Bill, who has watched me work through many different fiber disciplines (the more complex the better) came over and said: “You’ll probably hit me for saying this, but that looks pretty easy.  Doesn’t the needle just go up and down through the fabric?”  When I did not respond, but rose and headed for the kitchen to get more coffee, he added anxiously: “You’re not going to get a knife, are you?”  My refilled mug in hand, I explained gently that yes, the stitching itself is simple, but getting just the right effect is rather a challenge.  Especially for those of us without artistic training to ‘see’ the subtle transitions in light and color.

It would  have helped had I finished Mary Corbet’s long and short stitch shading tutorial last summer.  I would not be quite so far out of my depth.  At the time, I panicked because I found I needed to work under a magnifier when using a single strand of embroidery floss, and it took me two hours to stitch the first square.  You don’t want to know how many hours I have into these two little bits of ribbon!  All of them under a magnifier.

Being in a  tearing hurry to set this project up, and using  28-count linen from Michael’s, when I really should have ordered some 32-count, didn’t help either.  As it happens, on 28-count, the single strand shading tends to be a little too sparse and I  have to go back to address bald patches.  Continuing to stitch with two strands after the first row is too bulky (see the top half of the exterior face of the top ribbon).  Of course, like Bill, you may be scratching your head and saying: “Ribbon?  I’ll have to take your word for it.”

That said, I can see improvement in my technique as I work,  and this is just an exercise between Jacobean projects.